DIY 18650 Battery Charger
This project cost under $5, by my estimate. It was pursued solely because I noticed a very cheap li-ion charger IC on Digikey, and tossed it in my cart. Each chip is soldered onto a miniature board from Oshpark. Because they charge by the square inch, with evidently no price floor, the boards were practically free as well. I felt kind of dirty ordering them.
A DIY 18650 charger does have its merits, despite the frivolous motivation. Chinese battery chargers are untrustworthy; this is a circumstance where some seriousness is warranted. These batteries hold a lot of Joules. That being said, proper Western chargers are kind of expensive. Is fire safety really worth $20? Nope. Hire me!
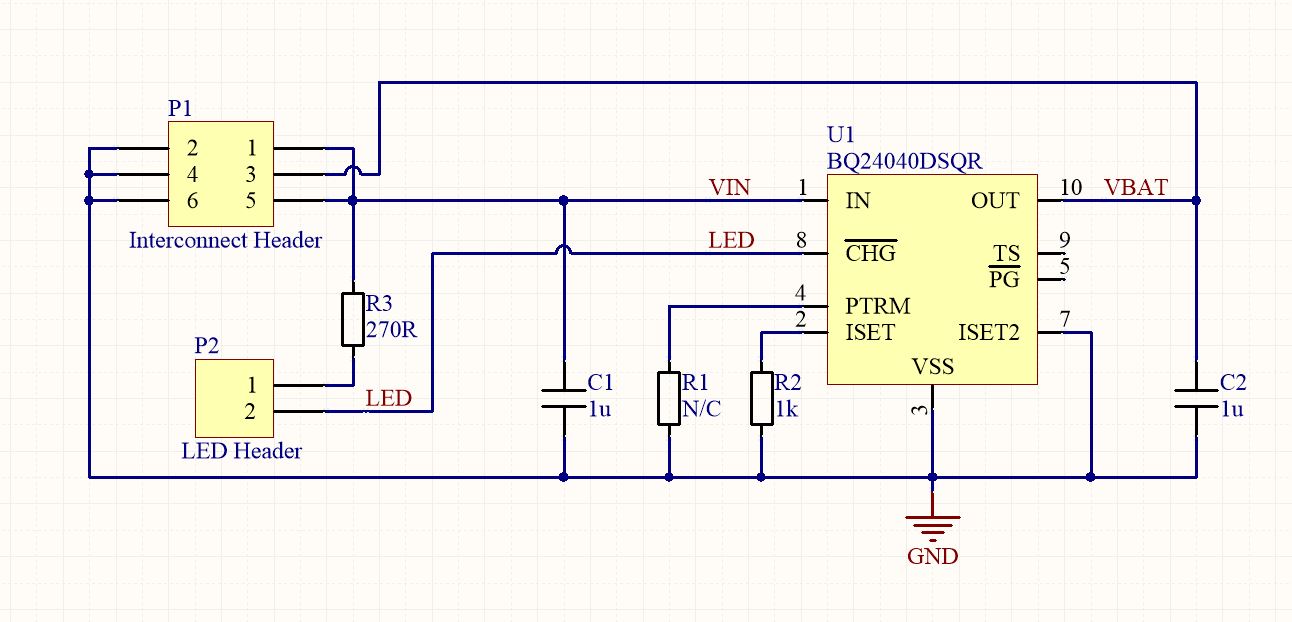
The BQ24040 charger chips aren't especially smart. Given they're from TI, though, I had no doubt that they'd work fine. A rectangular led is included for indication on charge termination. Two resistors are needed for LED current limiting and setting the 500mA peak charge current. The other passives are window dressing.

These chips are really small! This would not have been possible without a hot air gun. I did not order a solder paste stencil so I soldered these chips by pre-tinning the pads, applying flux, and then reflowing. The above picture was taken after I'd soldered some of the PTH headers for testing, so they look a bit ugly.
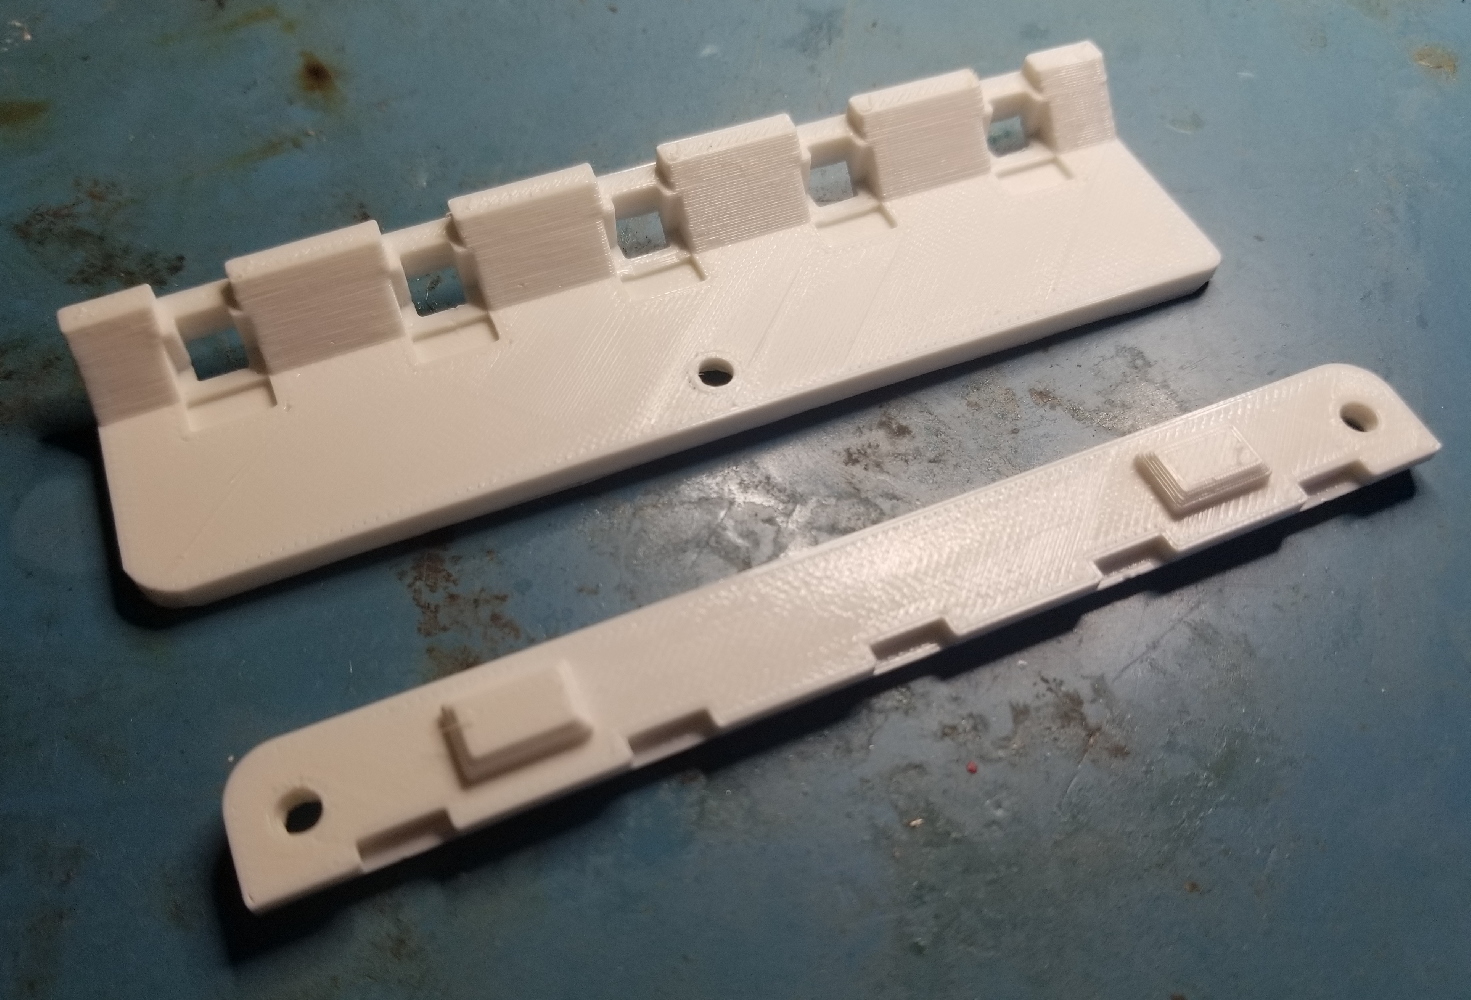
A housing was 3D printed in three pieces, as can be seen above and below.
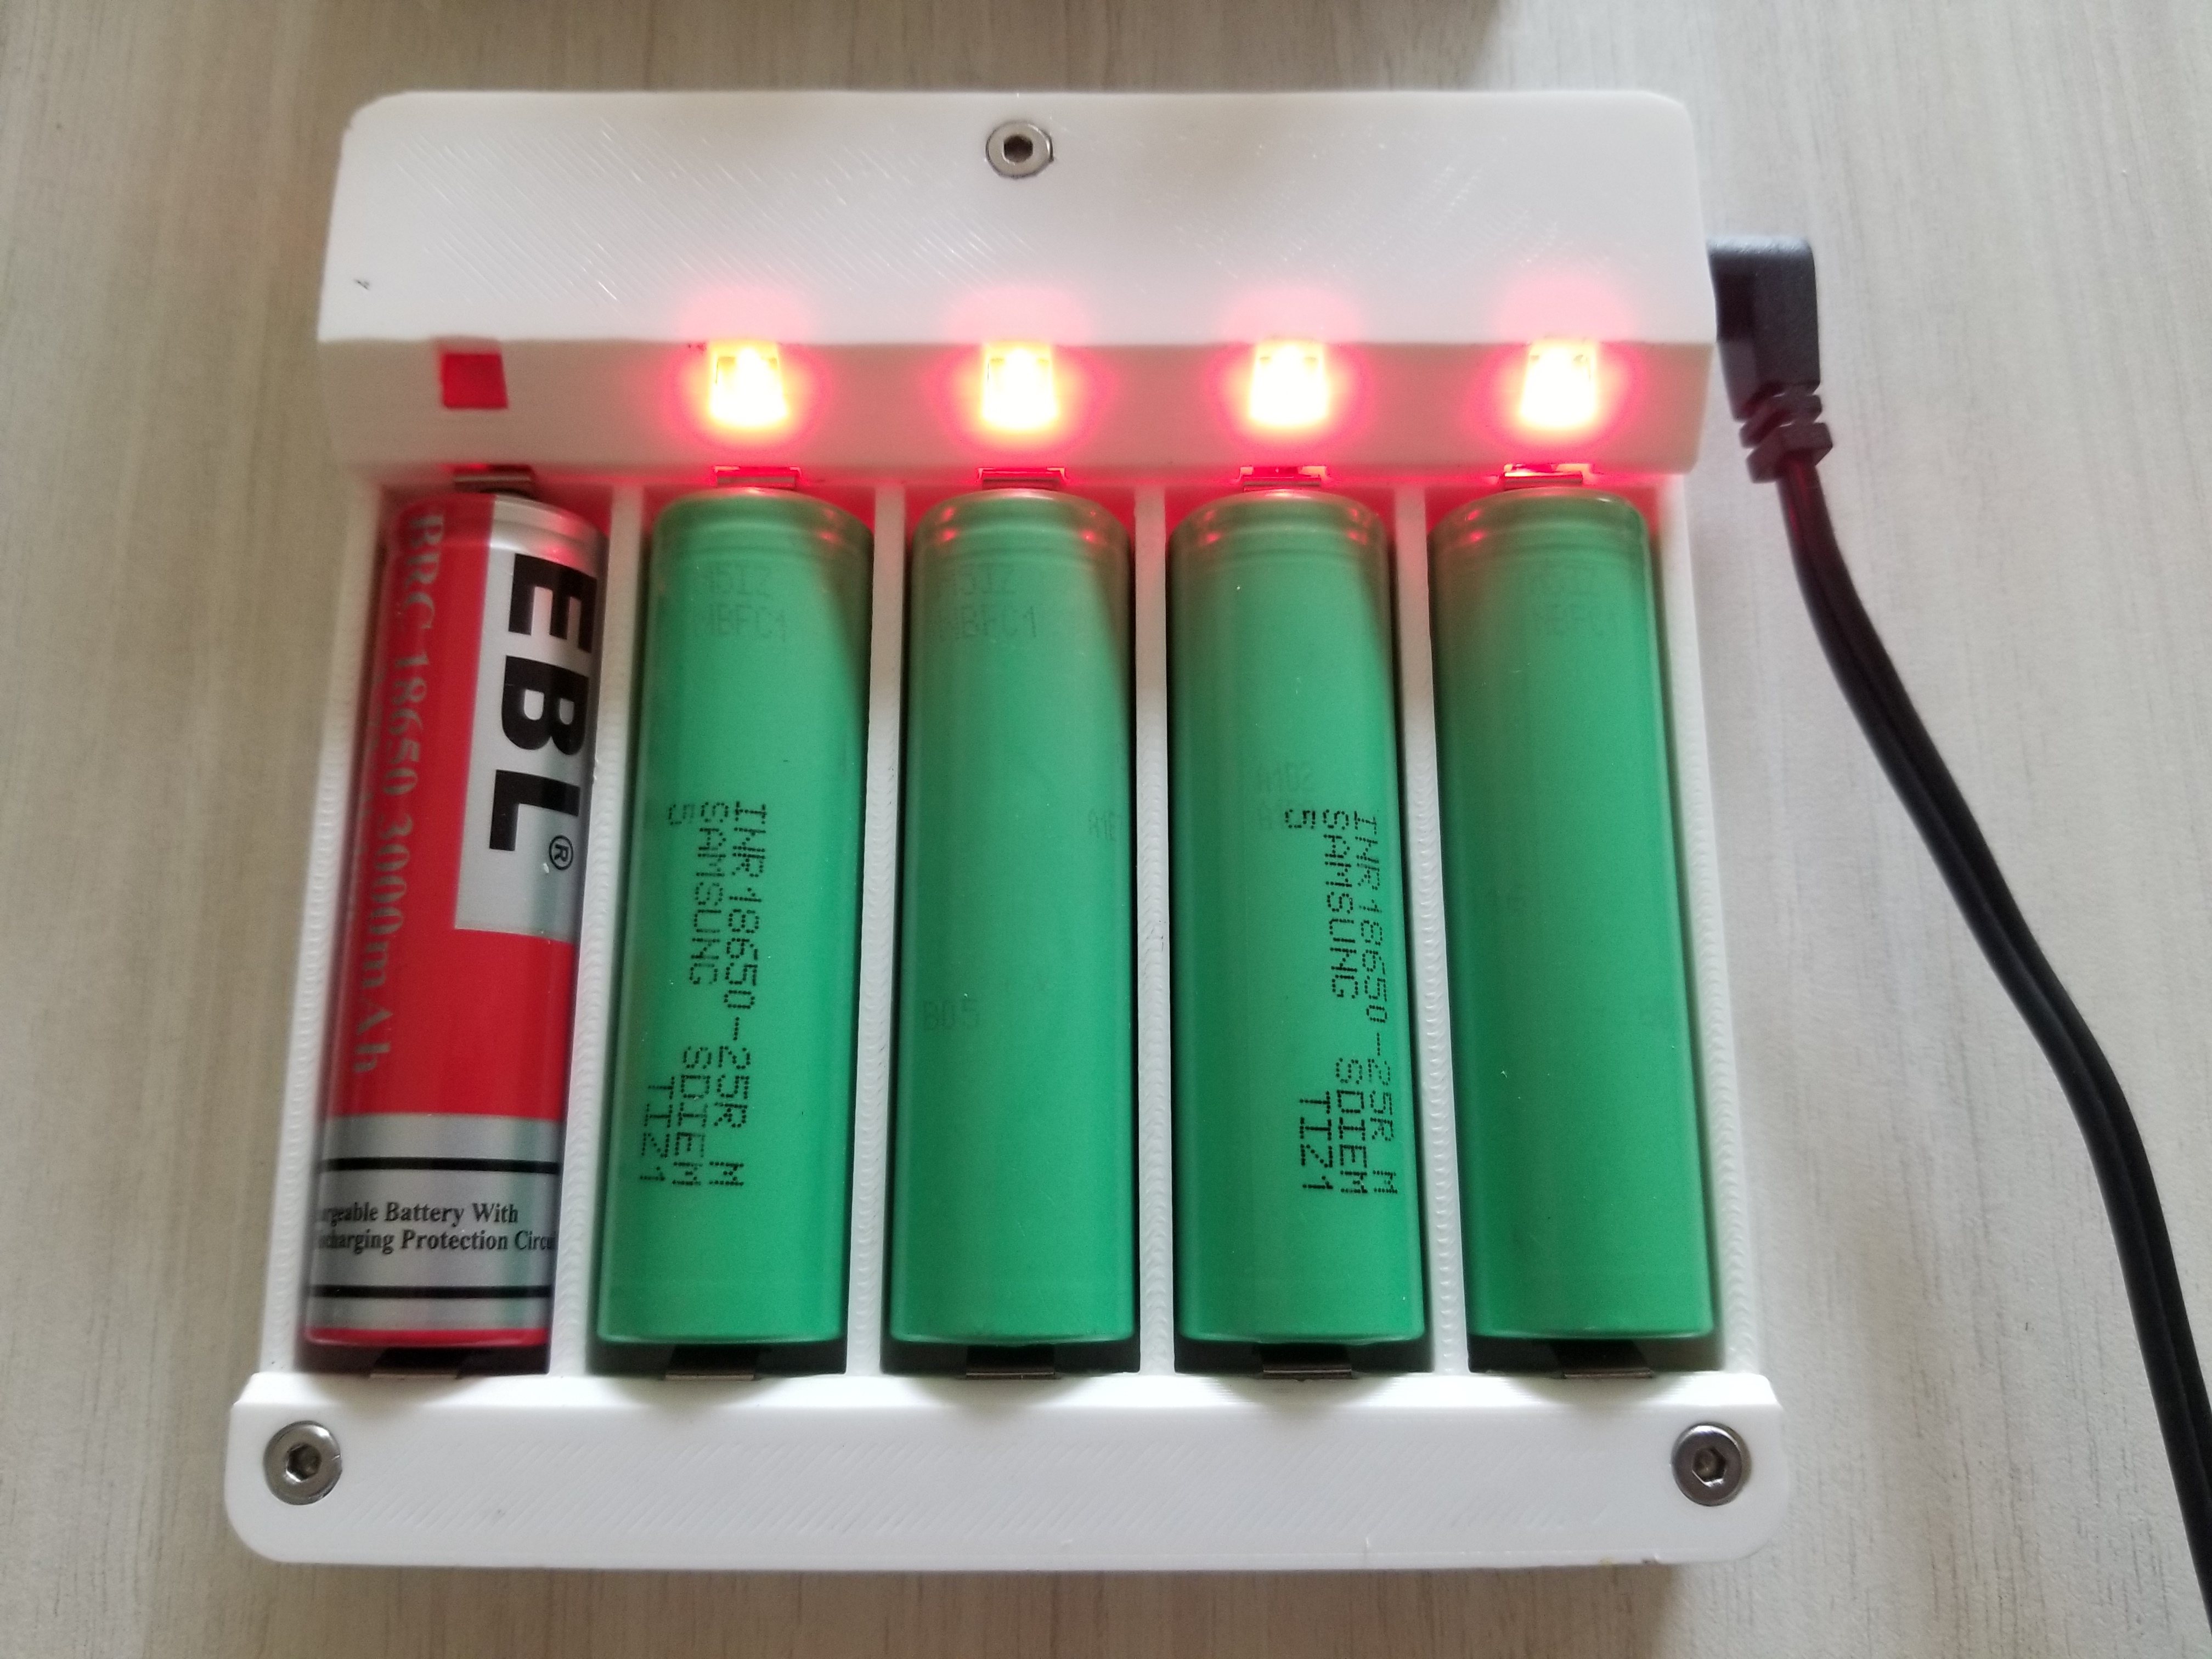
The main housing holds five charging bays with slots for snap-in leaf spring battery contacts. Behind the springs are fore and aft pockets for routing wiring. Wiring from the aft pocket gets fed into the forward pocket through holes underneath the charging bays. Adjacent to the forward pockets are slots for the charging boards. Each charging board has positive and negative terminal pads exposed to the forward pocket; wires from the leaf springs are soldered here.
Behind the charging boards there's a final pocket for routing wiring to a DC barrel jack on the side. Each board is daisy-chained, leading back to the DC jack. I've used a 5V/3A wall wart to power the assembly.
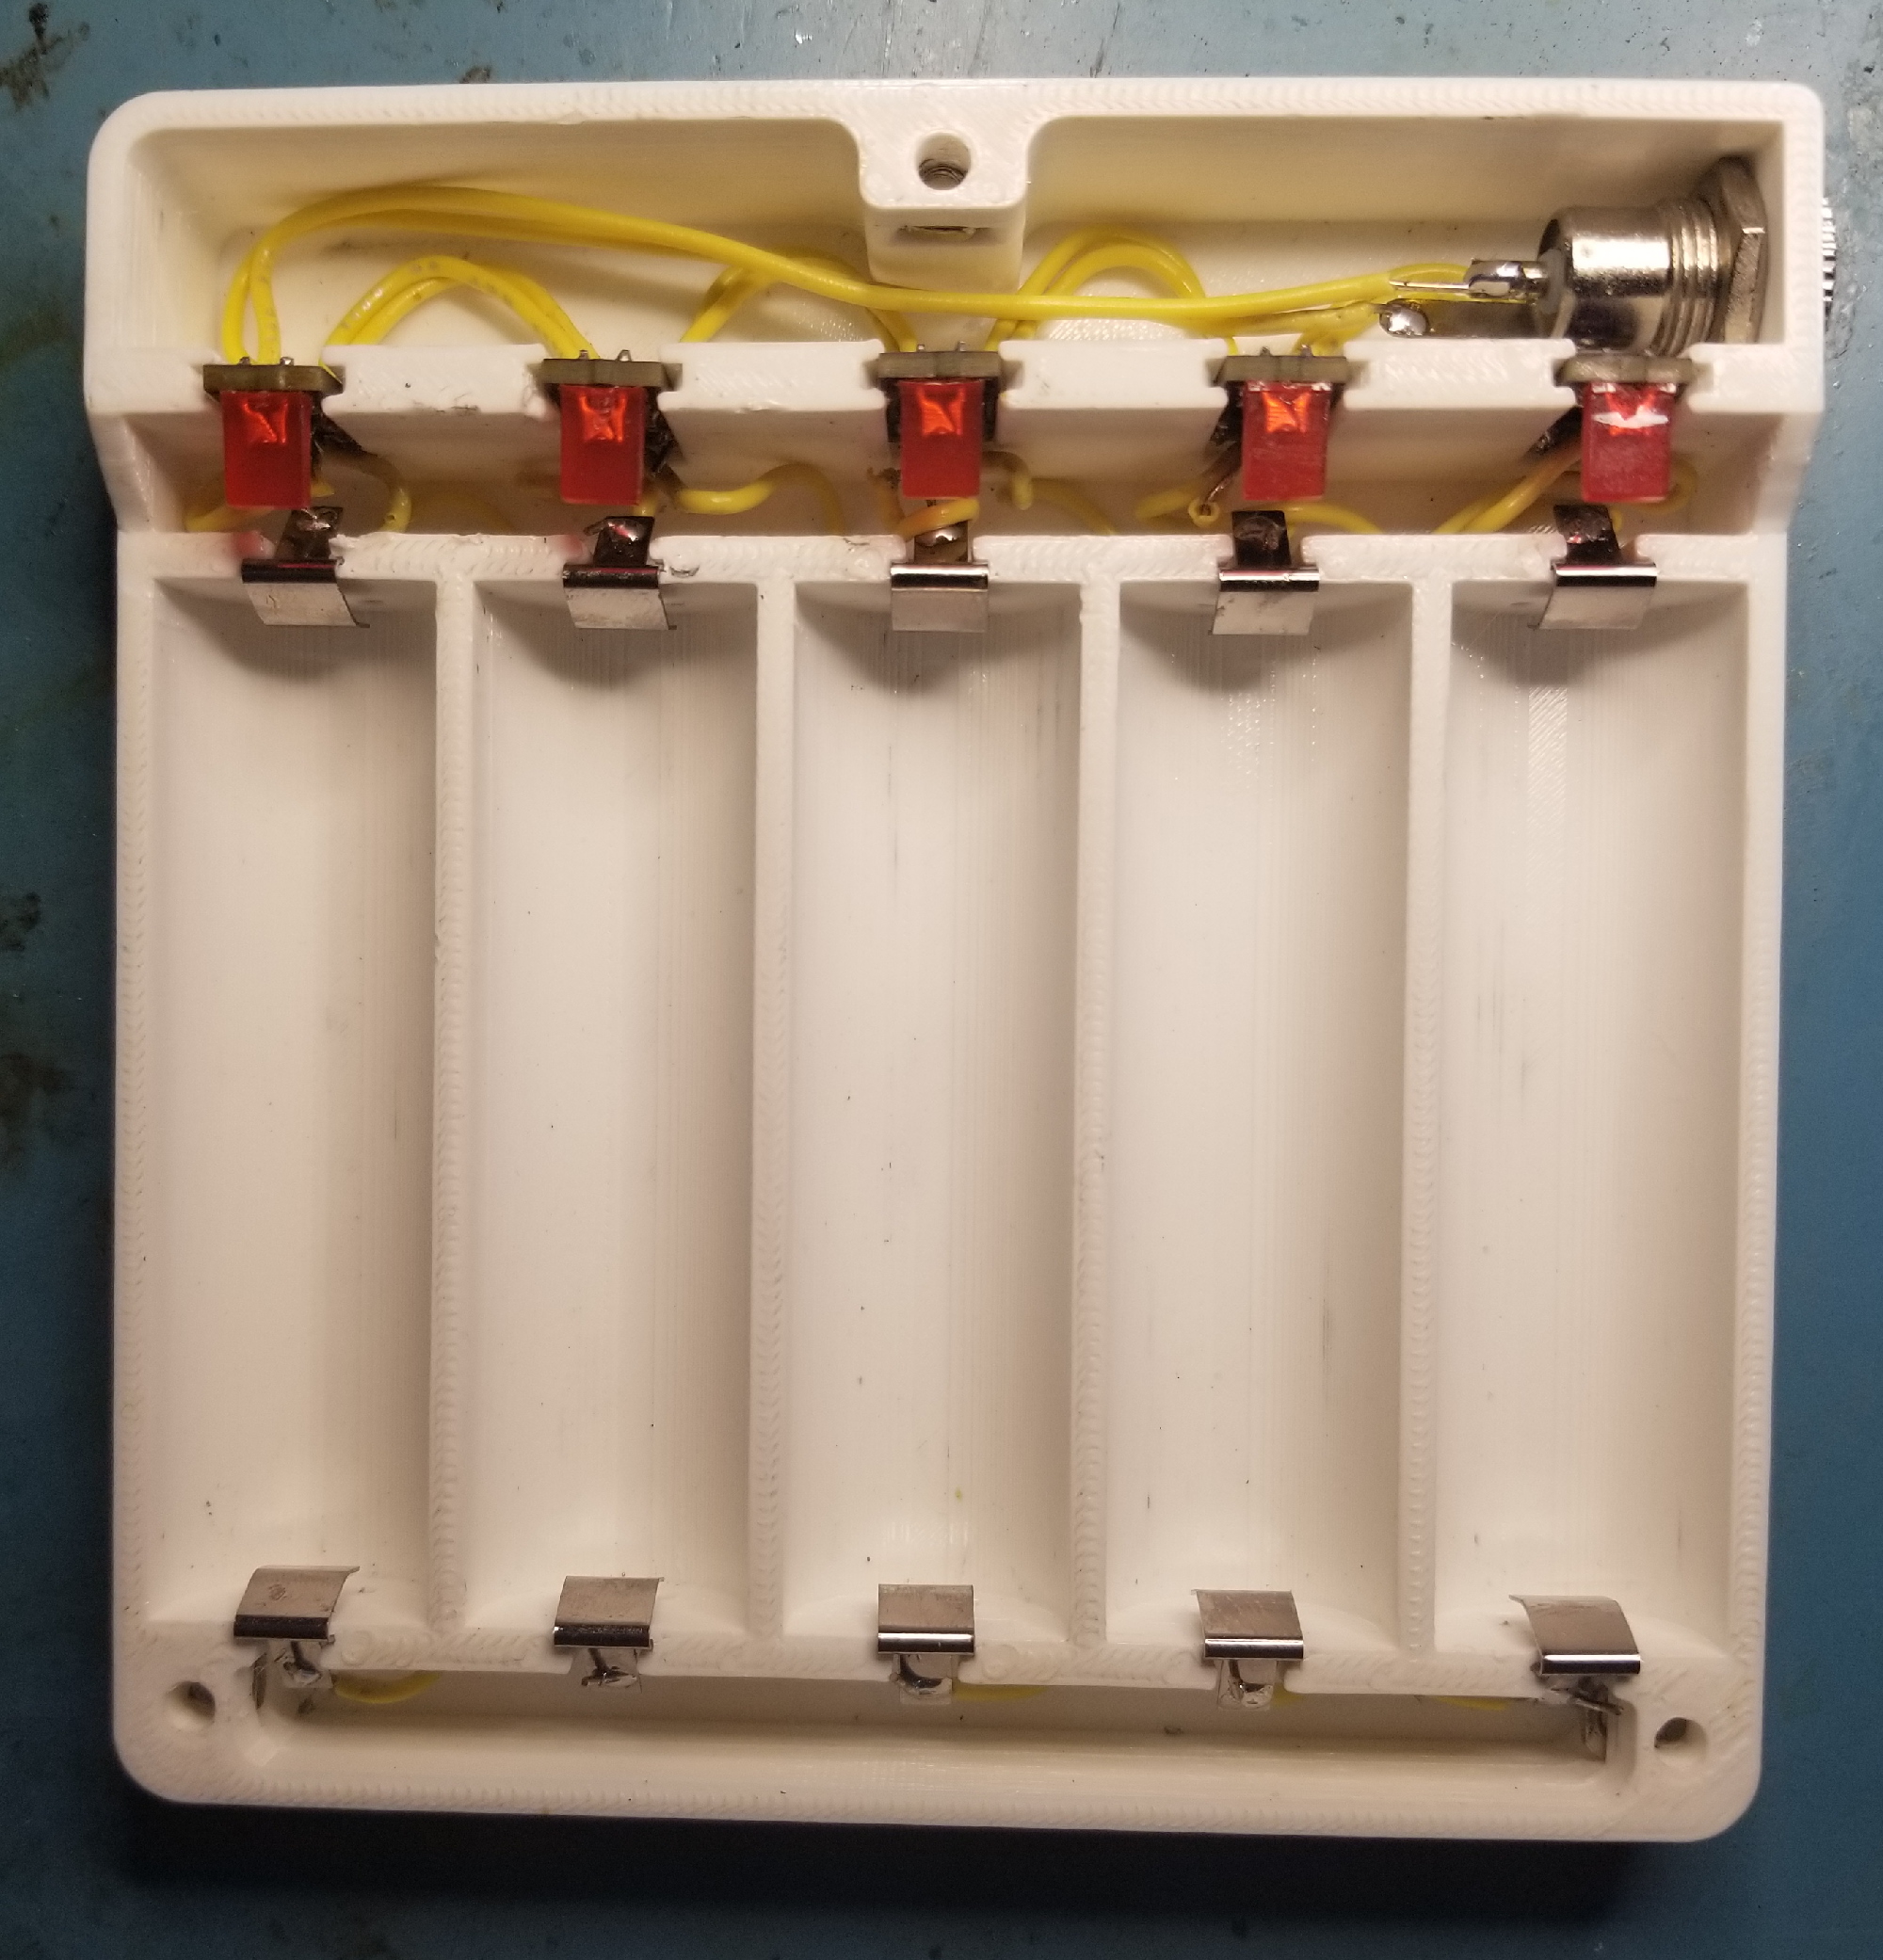
The result of all these pockets is an absolute mess of wiring. This was extremely difficult to solder and assemble; that's the price you pay for having five separate boards. All is well though: the pockets are hidden by two printed covers. No one has to know!