ESP8266 Programming Guide

The ESP8266 is an incredibly useful Wi-Fi enabled microcontroller. It's small. It's fast. It's under $2 on AliExpress. These traits have made the ESP very popular and have spawned dozens of different variants. Consequently, it's difficult to find programming instructions that actually work for your variant despite the large size of the ESP community and the abundance of seemingly-helpful programming guides on Google.
This guide is specifically targeted at the ESP module in the image above, commonly marked ESP8266MOD or ESP8266-12E or ESP8266-12F. This is a surface mount module, so I'm assuming that you're designing it into a PCB or are soldering it into some other permanent assembly.
Hardware
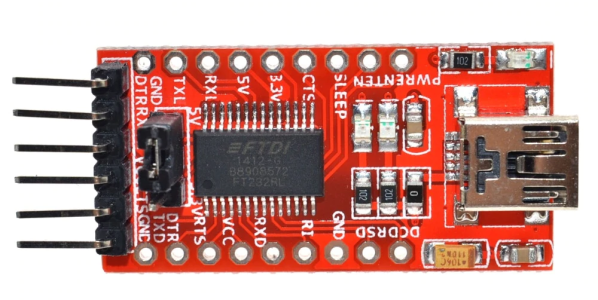
Buy an FTDI USB-Serial Module. Do it. They also only cost $2 on AliExpress. Some sources suggest that you can use an Arduino to program an ESP. Maybe, but you're mixing voltages, and I wasn't able to get it to work. Don't waste your time.
Set the jumper to 3V3. This is the signal voltage level that the ESP expects. The FTDI's on-chip 3V3 regulator won't provide enough current for the ESP though, so you have to provide extra power through one of two options:
Provide the 3V3 rail to the ESP through a bench power supply.
Solder a jumper wire to the 5V pad on the FTDI module and feed it through an LDO regulator to generate the 3V3 rail. Most people don't have LDOs lying around. But if you're adding your ESP to a custom PCB as I do, it's easy to add one.
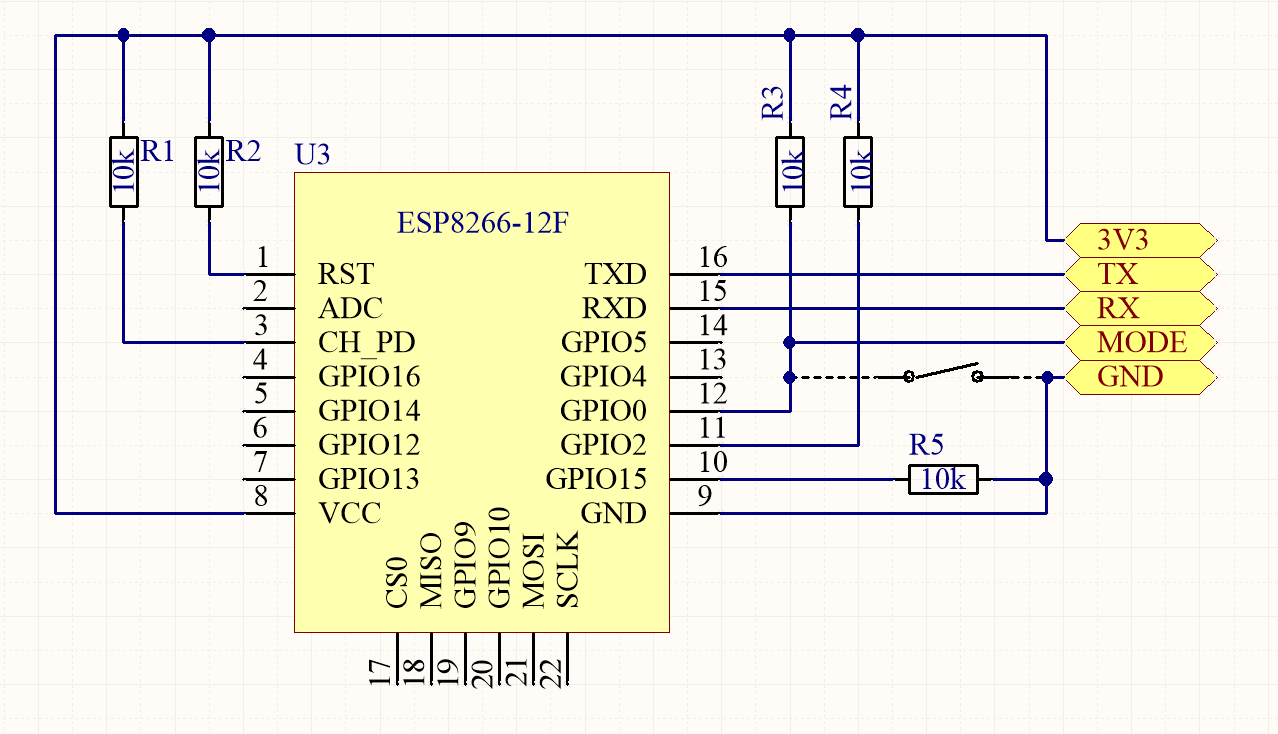
Wire the ESP into your PCB (or other assembly) as shown. The switch can be incorporated, but it's best to locate it with the FTDI module instead. Don't forget to add your 5V regulator if you'll be using one.
Wire your FTDI module on a separate breadboard, along with the switch as required. Connect as shown:
- ESP RX -> FTDI TX
- ESP TX -> FTDI RX
- ESP GND -> FTDI GND
- ESP 3V3 -> Regulated 3V3 supply as above (NOT the FTDI's 3V3 output)
- ESP GP0 -> Switch to GND
You can optionally add a switch from RST to ground to simplify power cycling. This requires an extra header pin on your PCB though.
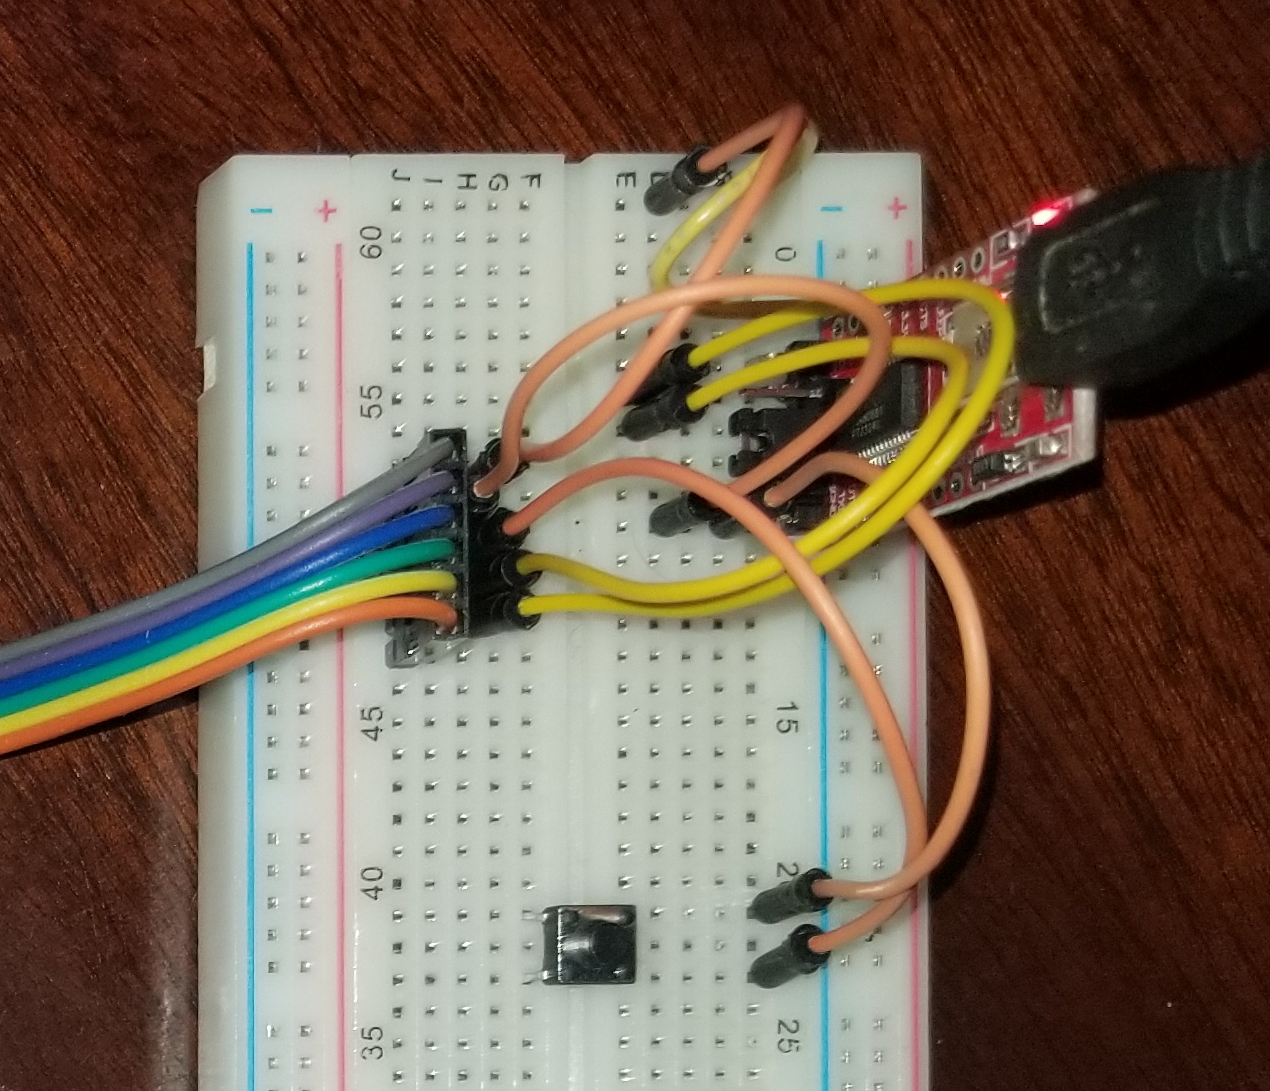
This is the breadboard I used to program my latest ESP project. Like all prototypes it's pretty ad hoc, but you get the idea. The ribbonized jumpers make desk-to-bench iterative programming a breeze.
Software
Use the Arduino IDE for a gentle introduction to the ESP's many quirks. Despite criticisms of the Arduino environment's sluggishness, you can still squeeze the 160MHz clock for all it's got with a little bit twiddling.
Install the Arduino IDE, version 1.8.12 at time of writing.
File -> Preferences. Set "Additional Boards Manager URLs" to this link.
While you're there, deselect "Check for updates on startup". Ha ha.
Tools -> Board: -> Board Manager. Search "esp8266". Install the result "by ESP8266 Community".
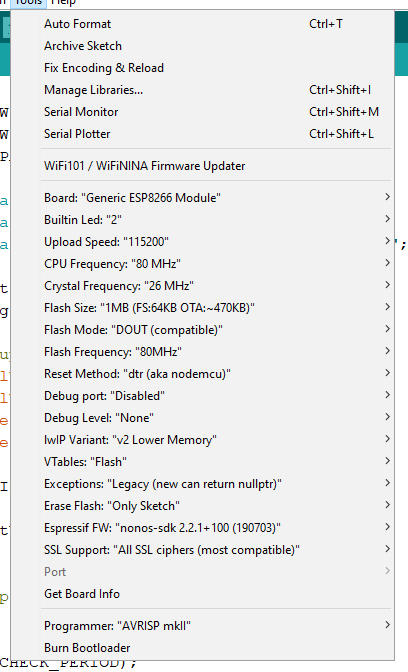
Tools -> Board: -> Generic ESP8266 Module.
File -> Examples for a great variety of sample code.
That's it. Copy my options if something doesn't work on your end.
Programming
If you've done the rest correctly, actually programming the ESP is simple. Cycle power to the ESP while holding the GP0/MODE button. The ESP will boot in programming mode. A switch to ground on the RST pin can be used in place of power cycling. Next, click "Upload" on the Arduino IDE. This will take a minute. Ignore the Hard resetting via RTS pin... message on completion, it's not relevant without special circuitry. Instead, simply cycle power to the ESP again without holding the GP0 button. The ESP should now be running your code.
If you weren't able to program your ESP with this method, a great many things may have gone wrong. Doubtless your issue won't be documented, like mine weren't. The most common faults though are an insufficient power supply, an upload speed in the IDE not set to 115200 baud, or crossed TX/RX wires.
Good luck!