DIY Humidistat
Some consumer gages are terrible. Foremost among this crowd are pressure gages, which have an odd habit of reading 10psi over. Cheap humidistats are equally dubious. This is one of those precious instances where DIY electronics beat consumer garbage in both cost and performance: a quality humidistat IC is much too expensive for mass production, but it's still only $3 on digikey!
I designed this project with intent to put it in a weatherproofed housing for use outdoors ("local" humidity reports are crap when the weather station is 30 miles away). I never got around to designing the housing, so it's an indoor sensor now.
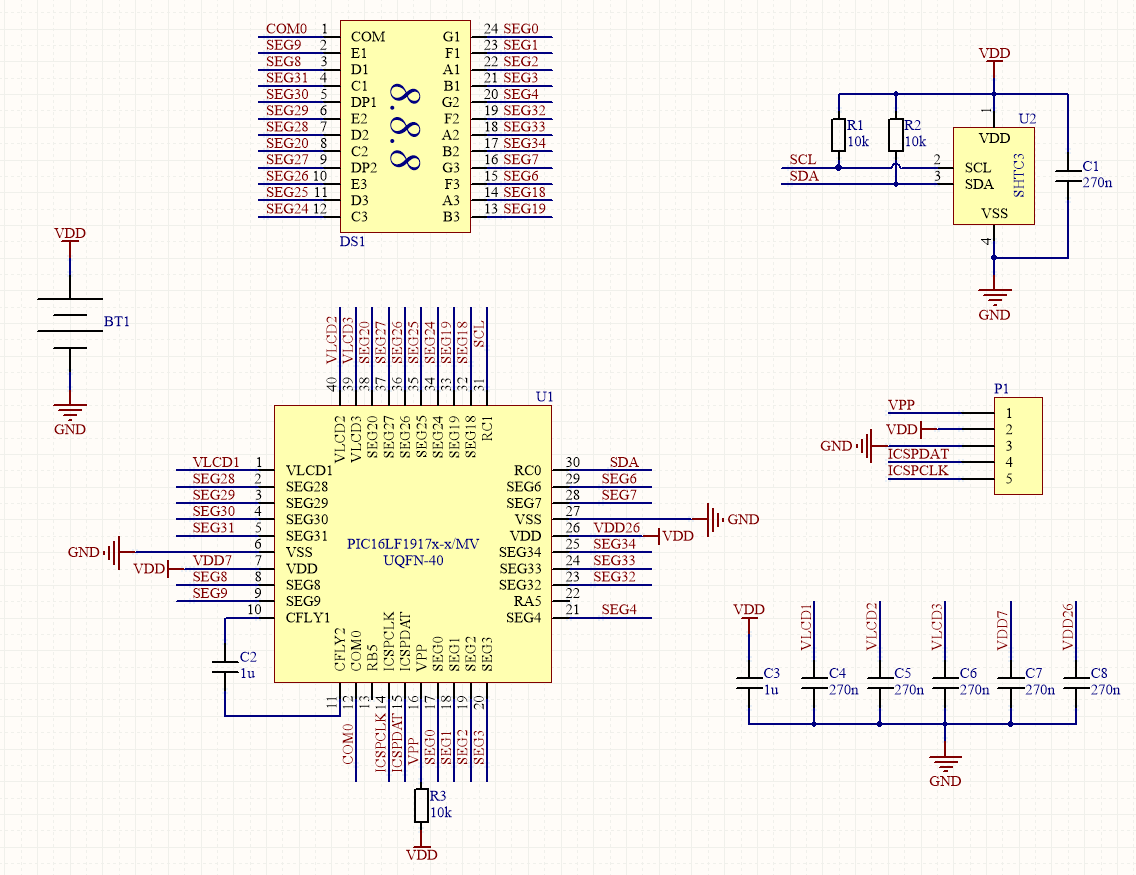
The schematic is as boring as it should be, to my credit. It's easy to succumb to the tendency to overengineer; dare ye not gaze upon the humidistat reference designs with peripheral circuitry galore.
I selected a PIC with an internal segmented LCD driver which allows for exceptionally low power consumption. A good CR2032 will last 18 months by my math. As it turns out, a shady aliexpress CR2032 will last 8 months.
The SHTC3 humidistat IC is the cheapest on the market capable of ±2% relative humidity. This is the best technology can offer for small form factor humidistats. This chip is a mere $3 one-off, and you can pay much more without getting better performance. It integrates a ±0.2°C temperature sensor, which is nice. It's worth noting that these tolerances are only maintained in the middle region of the measurement band and they're only "typical", whatever the hell that means statistically. Worst-case midband humidity tolerance is ±3.5%. I don't hold this against the SHTC3, this is true for other offerings. Just another instance of datasheets trying to mislead you. It's not lying, really, just read the fine print!
The display is an aliexpress mystery special. The viewing angle and contrast are no worse than western displays. Segmented LCDs are actually kind of expensive, if you consider their ubiquity, so I'd probably avoid using them if not for the cheap Asian offerings. That would be a shame - they're much more elegant than a digital display.
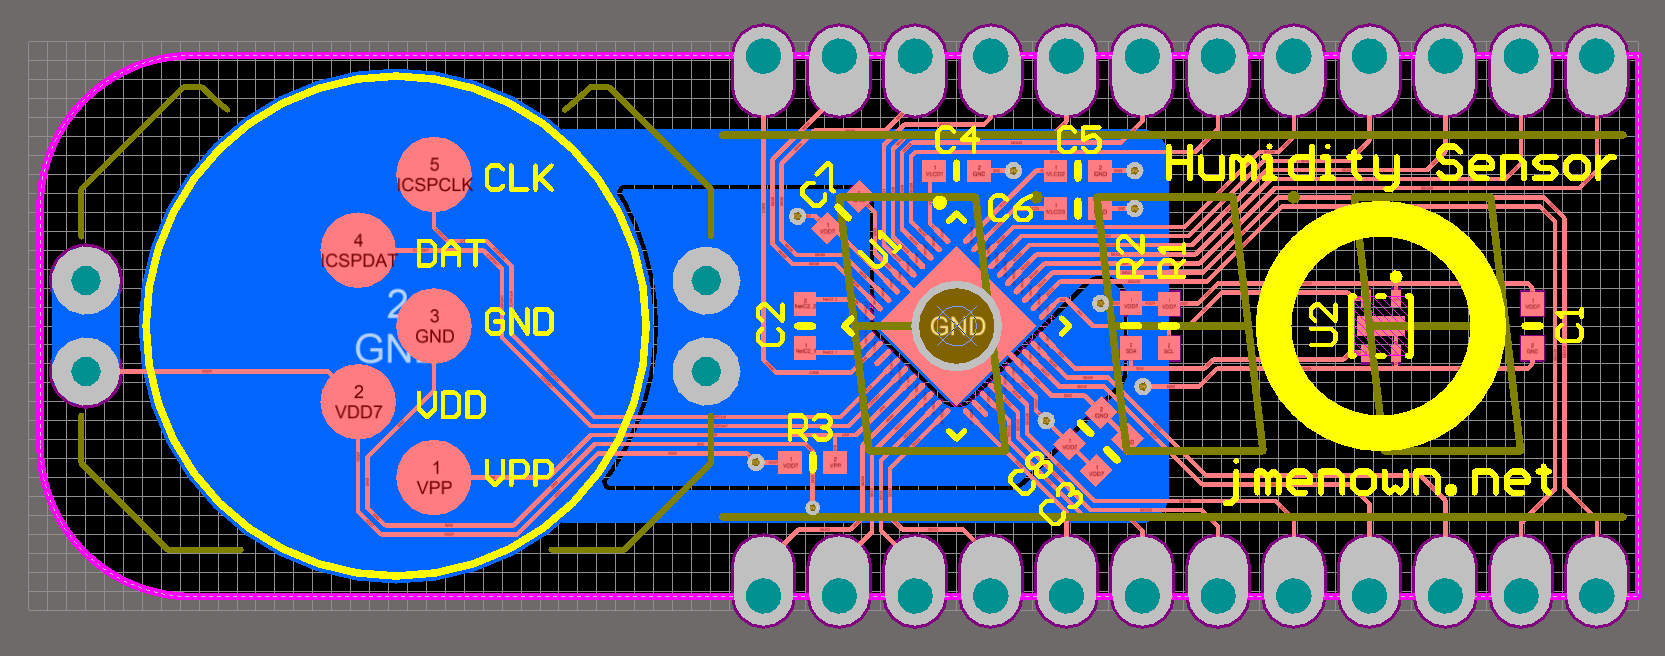
I'm proud of the board layout even if there's nothing really noteworthy about it. All traces are on top; the bottom layer is shared by concentric power and ground planes.
Note the large plated hole in the PIC's ground pad. This is an artifact of my QFN soldering method. I've stopped ordering solder paste stencils for my project as they're too expensive. Instead, I tin the bare pads with my iron, apply flux, place the QFN on its footprint, and reflow with hot air. This works exceptionally well (see the beautiful soldering in a picture below). The ground pad is an exception: it's easy to apply too much solder when tinning, meaning the QFN won't sit flat when reflowing. My solution is not to tin the ground pad until the rest of the pads are soldered. Then I can use the large plated hole to solder the ground pad from the bottom of the board. This sounds more convoluted than it is in practice.
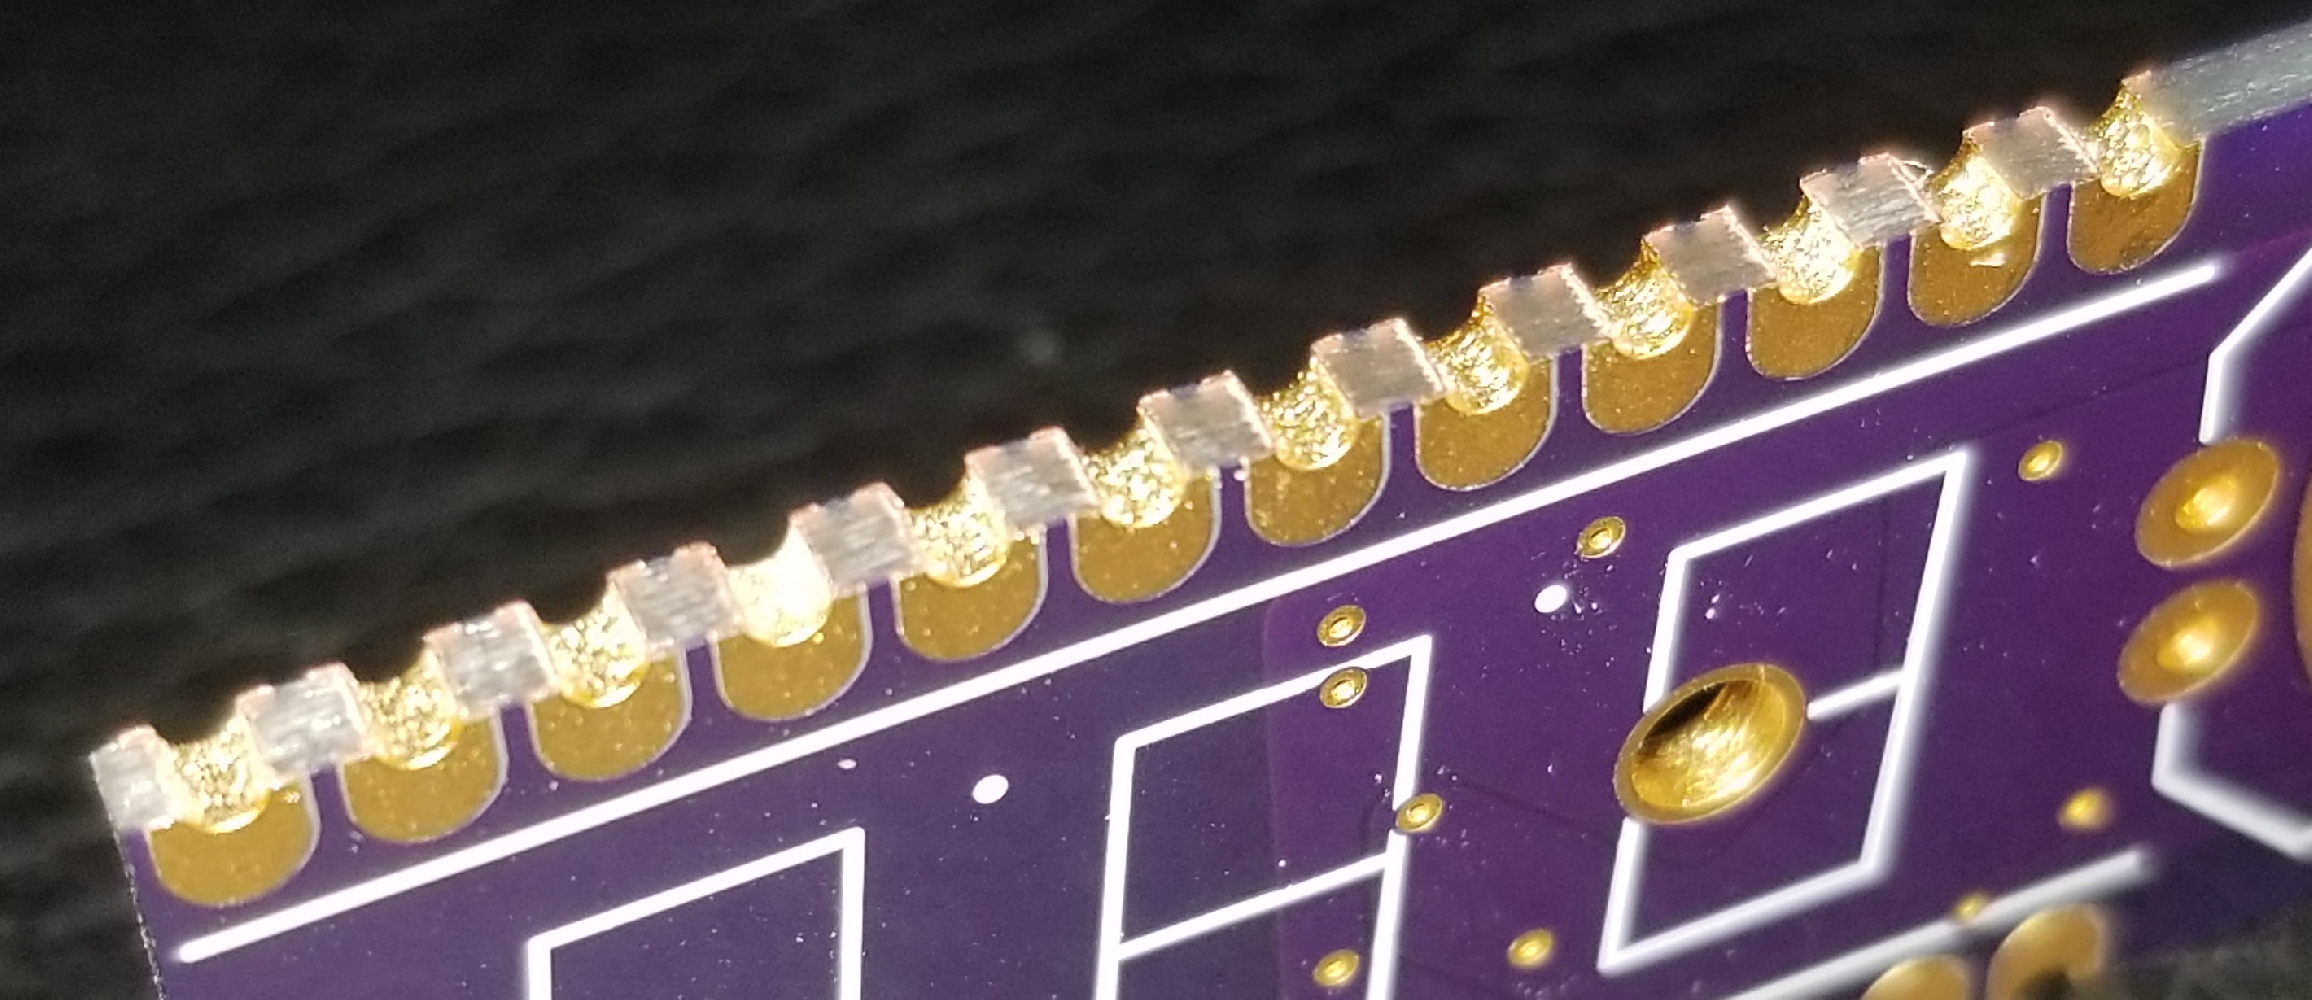
The board footprint is minimized by castellating the display's footprint. This is the first time I've ordered castellations from Oshpark and I'm satisfied with the result. The delivered boards had metal snags on the castellations that were removed by a side cutter with minimal effort.
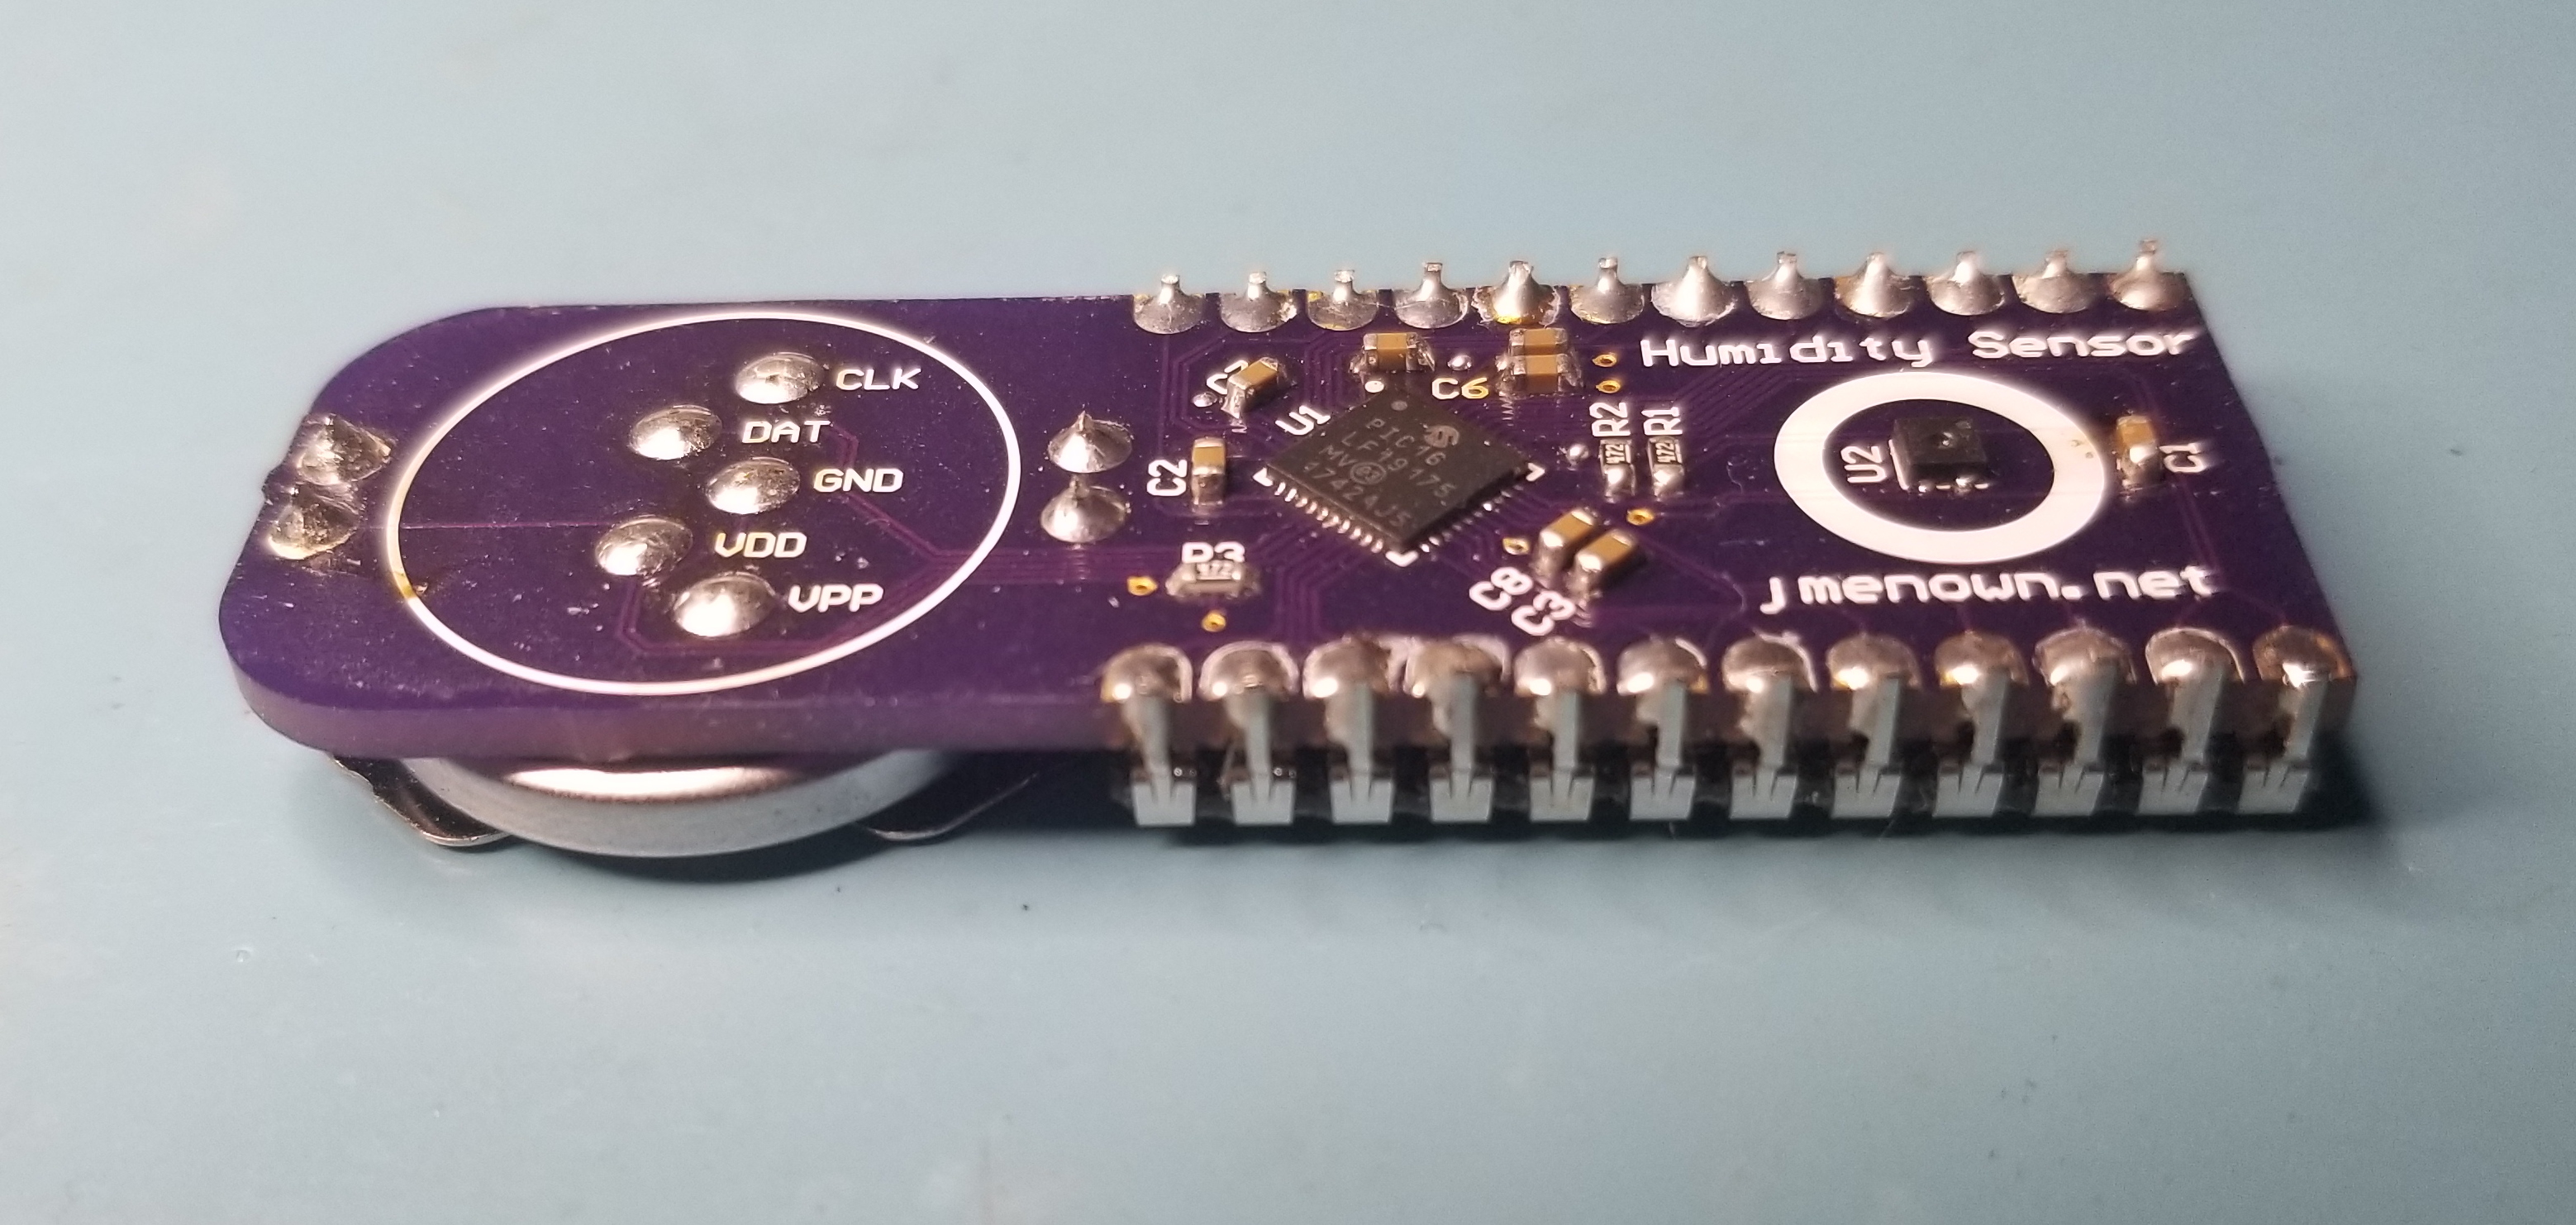
I'm very happy with the result. A few of the display solder joints look cold in this picture but I think that's just the lighting. The SMD solder joints are gorgeous in my opinion. I wish I could replicate them on other projects!
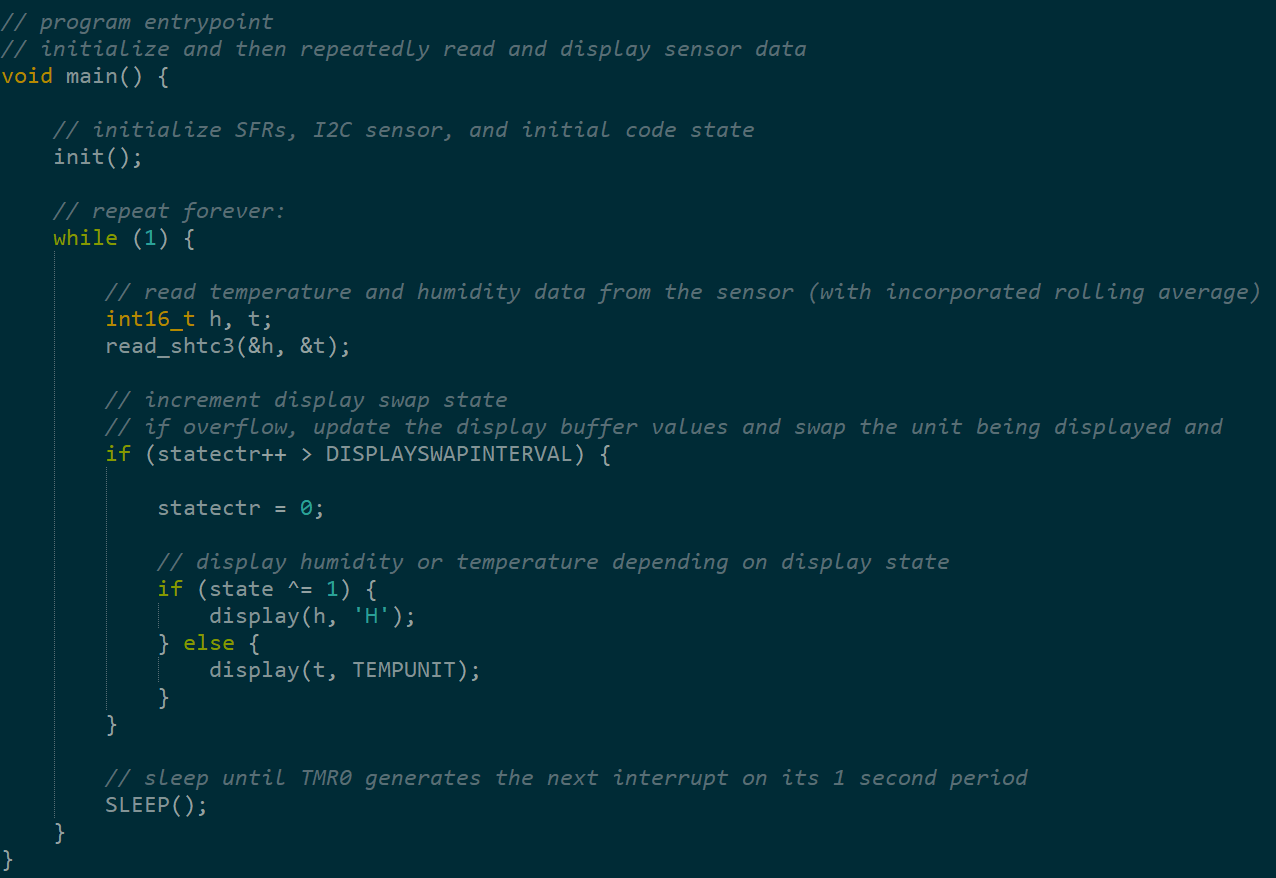
The PIC is programmed in C and compiled with XC8. The code is mundane so I've only added a snip of the main loop to convey the general idea. Humidistats are typically slow sensors so measurements are only taken once per second with 4X downsampling. Every four seconds the board will toggle between displaying temperature and humidity.
I have a vendetta against Git; it's by far the worst piece of software that I'm required to use. I'm familiar with it in a professional capacity but I absolutely refuse to spend a moment of my time uploading any personal projects to Github. The full code for this project will sadly remain a mystery until everyone adopts a less objectionable version control system.